Saturday, May 29, 2021

Road Trip to Nashville Day 1 & 2

Last night the hotel internet was not cooperating, so tonight will be a wrap up of day 1 and day 2 of our road trip to Nashville.  Sorry no pictures as my iphone is not cooperating  downloading my pictures.😬  Will post a few to Facebook after I finish this post.

We left our home at 7:15 AM Friday morning with our new car "Ace" packed for a 10 day road trip, not knowing what a post pandemic trip was going to look like.  Our first stop was planned to meet up with a good friend I met more then 10 years ago through blogging.  We completed three 25 mile bike events, even though we lived a state away from each other.  Frederick, MD is her current home, so we met there for lunch at Red Robin.  It was a nice few hours enjoying our meal with lots of catching up.  MUST plan another visit sooner than the five years that have passed since we last saw each other.

Around 1 pm we headed to our destination for the night traveling originally from Pennsylvania, through, Maryland, Virginia, West Virginia and finally back to Virginia.  Night one was spent in Harrisonburg, Virginia, where my oldest niece, Emily went James Madison University and now works for a non-profit in the downtown area. We drove by some of the university on our way to meet up with her and her boyfriend Eric for a nice dinner of specialty pizzas at Bella Luna.  YUMMMMMM, topping it off with some gelato across the street at their sister business. It was so nice to catch up with her and get a chance to meet Eric.  Crashed when we got to our hotel for the evening and even slept in later Saturday than we expected.

Day 2 Saturday

After breakfast we headed out for the day, traveling south with some more stops and sightseeing.  The weather was rainy and miserable, and SO chilly.  We had planned to head to the Cass Railroad in West Virginia for a two hour train ride, but after the checking weather on Wednesday, decide to cancel that reservation.  Instead we headed to Lexington, VA to drive through Virginia Military Institute where my nephew Ben (Emily's brother) graduated from two weeks ago.  The campus was so cool and we were glad to fit this in to our schedule.  

Since we had a shorter drive planned for the day, we headed from Lexington over to pick up the Blue Ridge Parkway.  Fun find for the day was going through the town of Buena Vista and spotting a sign with the word  "Phillies" on it.  Turned around to take a picture since this was the past manager, Charlie Manuel's home town!  So neat to come upon this since we had no idea when we set out on our route for today.

Not sure what the climb did to the car, but we drove some crazy sections of twists and turns as we climbed to an elevation of 2325 ft.  A terrible smell poured in to the car.  We stopped at the look out area and Andy determined it wasn't over heating or the brakes.  After opening the doors the smell eventually subsided and Andy thinks it may be catalytic converter or drive train.  The rest of the day was fine and he is off Googling what might have happened as I type this post!

It was raining as we got to our next spot, Nature's Bridge, so we just headed to the Virginia Museum of Transportation.  We both thoroughly enjoyed walking through the museum as well as outside to the rails to see an assortment of old trains of all kinds.  Amazed at how large some of them were as we could stand right next to them.

Another full day in the books for us as we had an early dinner and are relaxing in our hotel room with our HUGE TV for the night waiting to watch our Saturday night Grand Ole Opry concert!  Will arrive in Music City tomorrow!

Thursday, May 27, 2021

Nashville - Here we Come!

I have been a very inconsistent blogger over the last few months and I am so sorry about that!  More people seem to follow my crafting these days on my Facebook Groups;  Menagerie of Crafts as well as 2 Sisters Stamping, which I co-post in with my sister.

Well effective today, I am taking over this blog for the next 11 days, converting it in to a travel blog.  Way back over 10 years ago when the hubby and I traveled to Florida for Phillies Spring Training, I found it was a lot of fun to post the ins and outs of our trip.  It helped when I returned from our vacation to have a day to day synopsis of where we went, what we did and even what we ate.  My journaling was basically DONE and I hadn't even sent Snapfish the pictures to be printed!

So as we just loaded some of our luggage in the new 2020 Ford Edge we purchased in March.,we realized just how much two people actually need for 11 days on the road.  We head out around 7:30 AM tomorrow morning for our first day heading south to our final destination of Nashville, TN.   We are meeting my sister and brother-in-law for the National Garden Railroad Convention, being held at the Gaylord Opryland Resort.  Before we arrive in Nashville, we have a few other stops planned.

Looking forward to seeing a tons of trains and displays, but also hope to rub elbows with some of my favorite country music artists!  My eyes will be on the look out for Luke Bryan, Luke Combs, and any other important musicians that hang around Nashville.

Stay tuned......


Monday, February 22, 2021

Easy Peasy Monday

 Today I am sharing a card that ANYONE can make with just a minimal amount of supplies.  Just pull out a card base, some scraps of designer series paper, ribbon and a sentiment stamp set and you are on your way!  I needed some "Thank You" cards to insert with my Mercari and Etsy orders as a "thank you" for the sale when I mail off stamp sets and other items I have been selling on these sites.  Of course I want them to be made inexpensively, yet looking like I took more time that I did to make them.  Here are two of the cards I made, just changing up the colors as I used two different scraps of retired designer series papers I found in my stash. 😀


Here are the dimensions I used for this card for you to be able to case. 

Card base 5-1/2" x 8-1/2"

Mat:  3-3/4" x 5"

White piece: 2-1/2" x 3-5/8"

Designer Series Paper:  2-1/2" x 3-5/8"

Ribbon

Scraps for sentiment

Hint:  I adhered the white section to the mat first and the the designer series paper overlapped a little.

**Also make sure you adhere your ribbon BEFORE you adhere to the card.

Now was that easy peasy or what?

Happy Crafting!

Donna


Wednesday, February 17, 2021

Case It Wednesday

Featuring blog posts the entire month of February that showcase the Sale-a-bration items has been so much fun!  Please remember this sale is only good through the end of February.  All you need to do is purchase any products in the Annual Catalog or Mini Catalog.  The catalog notes which items you can select with a $50 purchase and which ones for a $100 purchase.  

When I spotted this card I immediately saved the photo and wrote down the basic directions.  In no time I had all the supplies gathered on my work space to CASE the original card using the FREE Sale-a-bration item "Berry Blessings Stamp Set with Berry Delightful Designer Series Paper".  For this item you need a $100 order to receive this FREE.

Since a stamp set came with this item, I knew I probably would only get one pack of the paper, so from the day I unwrapped this paper I knew that I was going to use it sparingly.  I looked for ideas that used a variety of the papers and smaller pieces.  I had also purchased the Sweet Strawberry Bundle from the Mini Catalog, so this card uses the stamps and punches in this set.  If you do not have this bundle, there is plenty of paper with larger strawberries and small flowers on it that you can fussy cut out to make this card.

Here is the card made almost exactly like the card I cased.  I just used Basic Jewels for the center on the small flowers.

.

After I completed this card that I am in LOVE with, I pulled out the Paper Blooms Designer Series paper that is FREE during Sale-a-bration with a $50 order and created the following card.  All of the flowers are fussy cut out using the designer series papers.


Here are the dimensions if you want to CASE this card and make it like the demonstrator I CASED, 
Connie Babbert at inspiredtreasures.com or just pull out any designer series paper and make it your own!

Card base is 4-1/4" x 11" scored at 5-1/2" or 5-1/2" x 8-1/2" scored at 4-1/4"
Basic White mat 4" x 5-1/4"
Designer Series Paper 3" x 4"
Designer Series Paper for rectangular blocks - four pieces 1-1/2" x 2-1/4"
Basic White for sentiment 3/4" x 2-1/4"

If you have any questions with the card or placing an order please let me know I will be more than happy to help you.

Happy Crafting!
Donna


Monday, February 15, 2021

Easy Peasy Monday

 A lot of people fit in a lot of chores and errands on the weekend.  Some they like to do and others not so much.  Monday's we need something "easy" to start off our week.  So Monday's I will begin to feature an easy card you can make to start your week with some creativity!

Hydrangea Hill Suite is one of my favorite items in the Mini Stampin' Up Catalog.  Since I featured this set during the "2 Sisters Stamping" catalog launch I purchased the suite and received all of the products that coordinate.  This simple easy card features quite a few of them.


The base of the card is a 5-1/2" x 8-1/2" sheet of Mossy Meadow.  I selected the green plaid side of one of the designer series papers and cut to 4" x 5-1/4".  On top of that and under the 3-1/2" x 4-3/4' piece of Basic White, I added a 3-1/4" x 5" piece of the Mercury Glass Acetate.  Just enough for it to "peak" out from behind the Basic White.  Using the "grunge-like" stamp from the stamp set I stamped (from bottom to top) using Highland Heather, Mossy Meadow and Rococo Rose.  I stamped off to create the second Mossy Meadow and Rococo Rose grunges.  Finally, I fussy cut out one of the small hydrangea bouquets and used dimensional to pop it up,  Add a sentiment of your choice to complete the card.

It's that "EASY"!

If you have any questions or would like to place and order, please let me know.
Happy Crafting!
Donna


Friday, February 12, 2021

Funday Friday with Paper Blooms

 LOVE LOVE LOVE this simple and so easy card that I created for todays "Funday Friday" video which is posted on my Facebook Group, Menagerie of Crafts.  If you are not a member of this group, comment here and I will add you if you cannot find it by searching.  Each Friday I try to post a video showing current products and how to make a simple card that you can create in little time with few products.  Today I am featuring the Paper Blooms Designer Series Papers which are FREE until the end of February with a $50 Stampin' Up purchase.  If you have any questions about purchasing, please contact me.

Here is the card for today.  I am challenging each of you to create a similar card and post it in the comments here or on my Facebook page.  Don't have the Tailored Punch?  Pick one you might have!  How about a hexagon, triangle, square, circle punch?

Happy Crafting!
Donna


Wednesday, February 10, 2021

Case it Wednesday

 I kind of went "WILD" creating cards with the card I selected to "CASE" for todays post.  I was so excited how quickly the first card came together, that I rummaged through all the current designer series paper scraps I had and came up with five more cards besides the first one!

Giving credit where credit is due, one of the favorite Stampin' Up! Deomonstrators I follow is Stampin' Pretty.  When I follow certain individual, I tend to lean towards those that have simple cards with a WOW factor.  Mary Fish of Stampin' Pretty just has that 1,2,3 punch for me!

Here is the card I made from the original post using the Hydrangea Hill Designer Series Paper from the current Mini Catalog.  The only difference was that I used the Stitch Shapes Circle die to cut out the flower, whereas Mary Fish fussy cut out the flower and adhered it to a piece of Basic White Cardstock that was cut out using the die.  I also changed out the sentiment.


Here are the other samples I created, using the Flowers for Every Season and Whale of a Time Designer Series Papers.


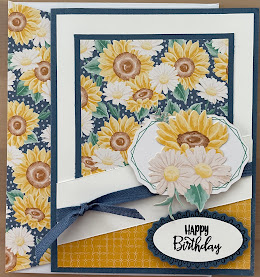
Here are the basic measurements for this card.
Card base: 5-1/2" x 8-1/2" scored at 4-1/4"
Basic White mat: 4" x 5-1/4"
Mat for Designer Series Paper at the top: 3-1/4" x 3-1/4"
Designer Series Paper:  3" x 3"
Designer Series Paper for bottom of card:  1-3/4" x 4"
Basic White Diagonal Strip:  1-1/4" x 4-1/2" (place the left side 1/2" up on left side and abouit 1-1/2" on right side)

Credit: Mary Fish

Have a great crafting day!
Donna